
Does one need a scissor keeper?
Yes, you do.
You just don't know it.

Scissors need safe keeping
and I'm here to help.
This keeper will fit an 8" pair of shears
as well as a regular sized rotary cutter.


Join together scraps that will create
a 5" x 11" piece of material.
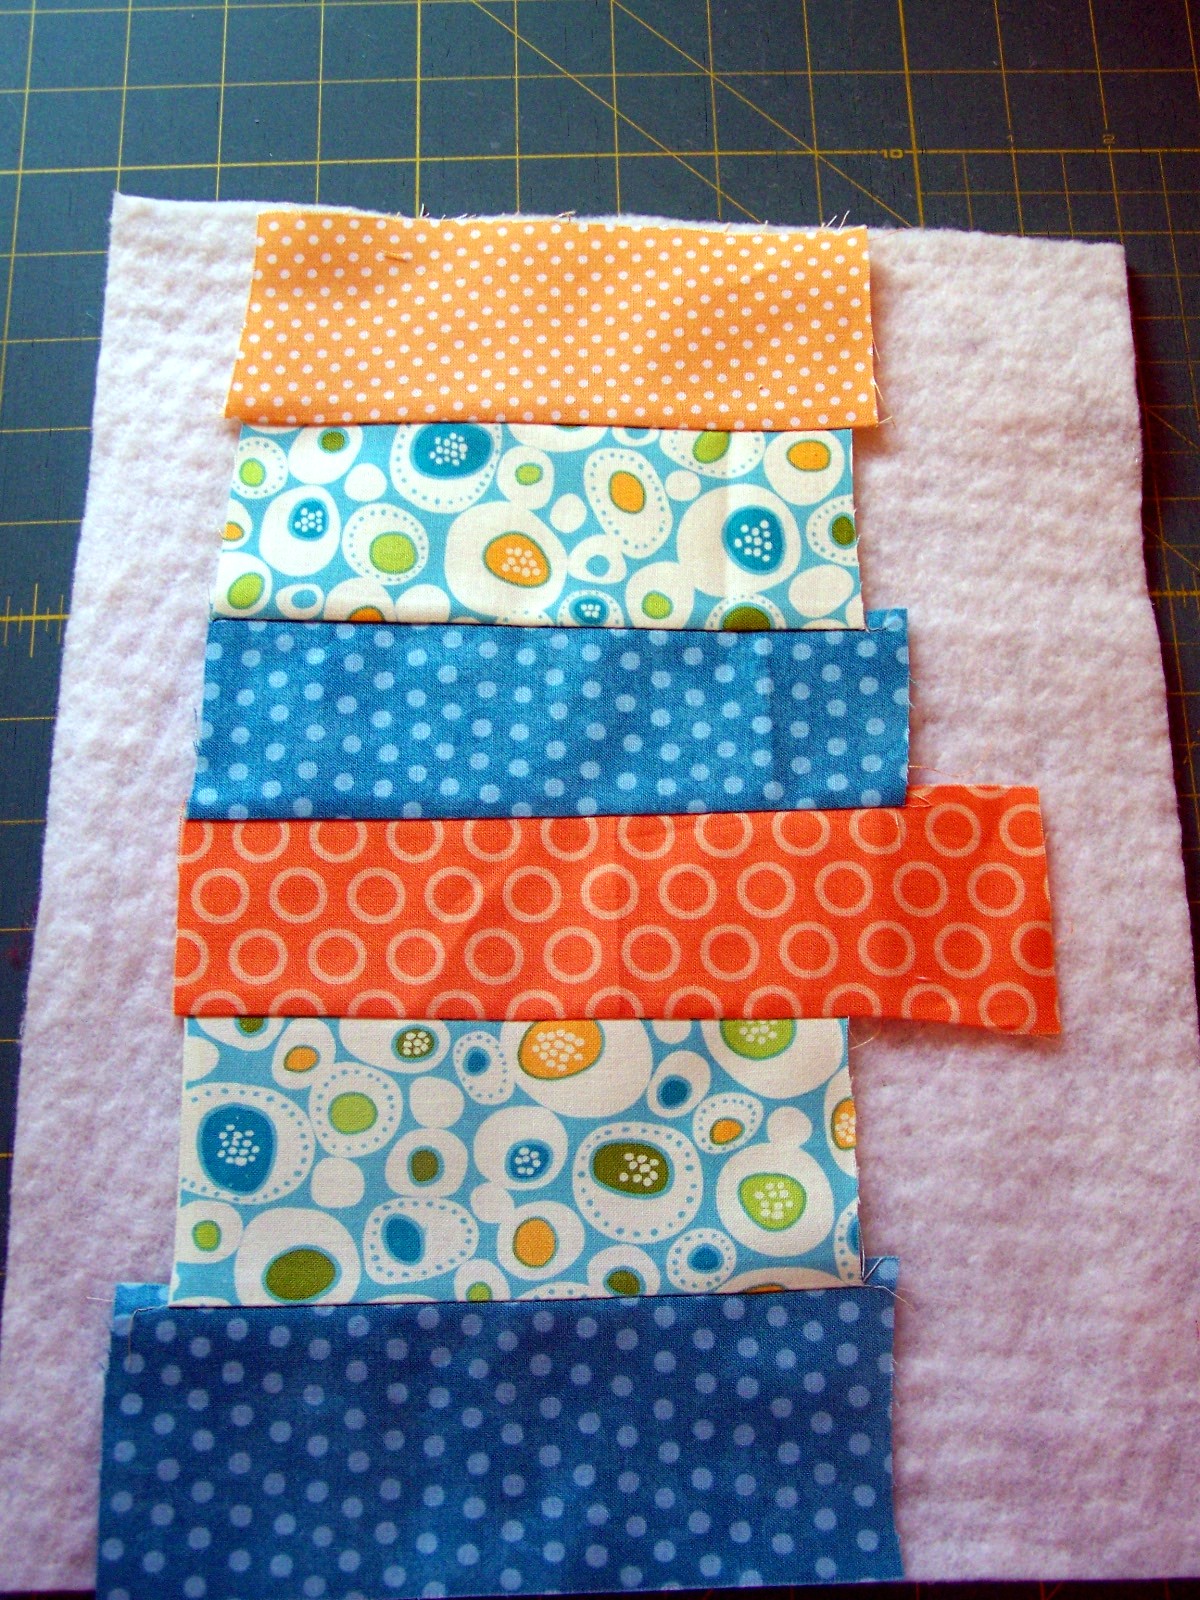
Put on top of a piece of scrap batting the same size.
Run some 'quilting' stitches through the 2 layers.

Use a coordinating piece of felt for the back.
Layer the quilted portion on top of the felt.
Download this pattern.

Lay on top of your quilted piece and felt,
cut around pattern with pinking shears.
If you don't have pinking shears it's okay.
Just use regular scissors.
This is a rustic scissor keeper.
This is a rustic scissor keeper.

Cut your flap out of felt.
Trim about 1/2 " to 3/4" at the top
of your quilted top.
of your quilted top.

This leaves room for you to slip your scissors in.
Lay flap on top.
I use about a size 8 perle cotton
to sew it all together.
I use about a size 8 perle cotton
to sew it all together.

Start in the upper left hand corner, with the knot on the back.
Sew across the top of the felt flap and then continue on around the

scissor shape in one continuous seam.
End with a knot up where you began.

Sew a button in the center at the top of the quilted front.

Feel under the flap where the button is and make a mark with a pen.

Cut on this pen line for a button hole.


Easy.

You're done.
Enjoy the safe keeping of your precious scissors!


What a handy little scissors keeper! Thank you for the tutorial!
ReplyDeleteWonderful tutorial. I have been making glass cases, but too lazy to snap shots of my progress for a tutorial, I just make things without thinking;)
ReplyDeleteDebbie
I do indeed need one for my little snips! Thanks for the cute tute!
ReplyDeleteI could probably tackle that. Turned out cute! Awfully nice part of your sewing kit.
ReplyDeleteWonderful tutorial...thank you so much!
ReplyDeletethanks for sharing that with us.
ReplyDelete