Showing posts with label Taffy Tutorials. Show all posts

Wednesday, January 27, 2016

Quick and Easy Valentine Advent

 February 1st is just a few days away!


I thought I would throw together a very simple 
advent for some young, college lovebirds.  


Since fabric is what I always have on hand, 
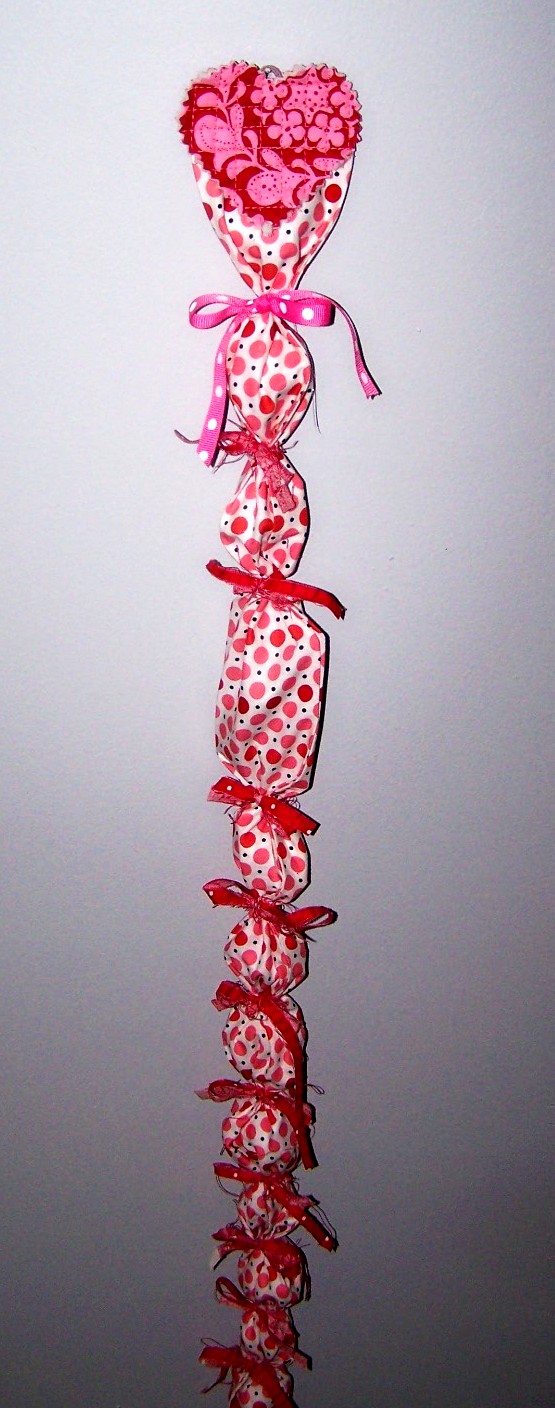
I went with making a tube of fabric. 
I'm only putting in a couple of kisses per day. 
It's the thought that counts, people. 

Cut a strip of fabric 6 1/2 " x 42ish. 
Fold in half, right sides together.
Now it's 3 1/4" x 42"ish.
Sew along the bottom and up the side.
Leave the top open. 
Turn inside out. 
Press under the raw edge for a clean finish. 
Now we have a tube with one end open. 


I decided to go with a joke a day 
and a couple of kisses. 
Simple, remember. 
Jokes from here.
Okay, I threw in a Panda Express card 
for ONE day.  :) 

Drop your kisses and joke and then tie it off.
Drop in your next batch of kisses and joke and tie. 
See the pattern?

The joke was a little tricky to get in there 
because it's not heavy like the kisses. 
So I pretended I was in 1989 and putting on panty hose.
 (does anyone remember wearing panty hose?)
Scrunched up the long part on my hand 
and then slipped the joke in. 

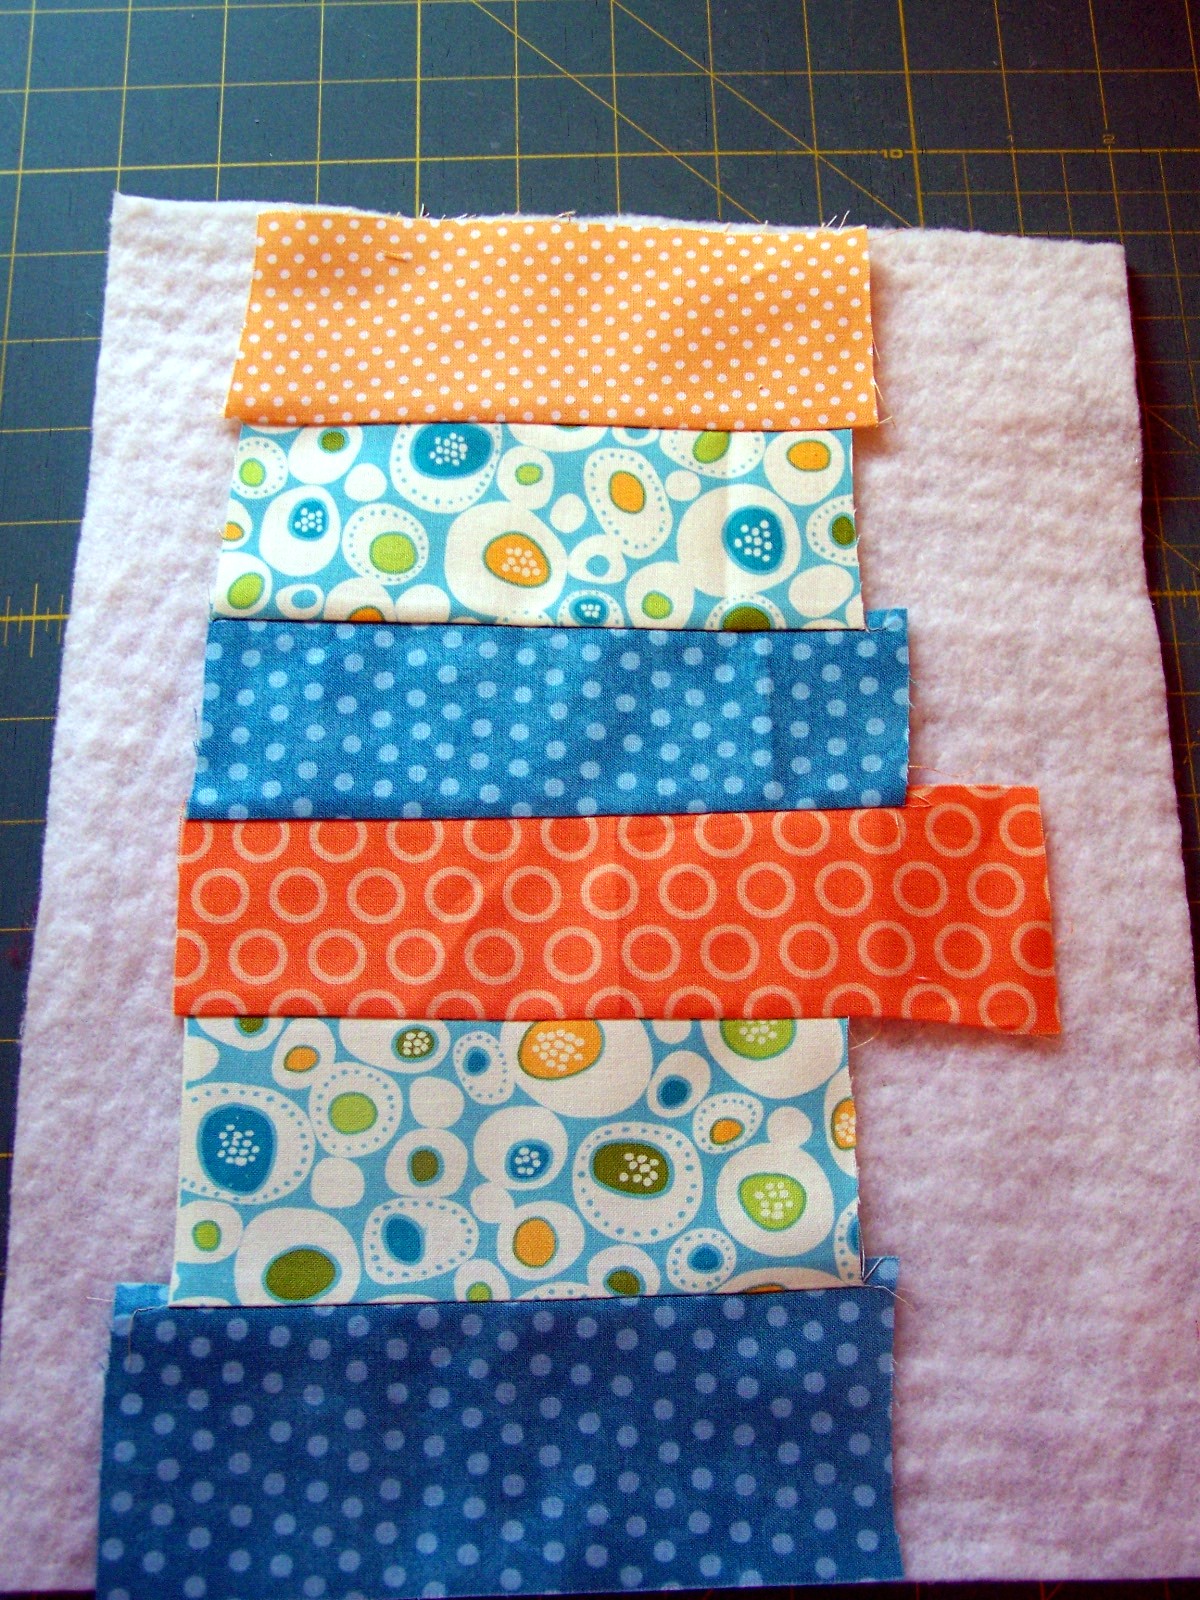
For the topper I just made a little quilt sandwich, straight stitched and then cut out a heart shape with a cookie cutter. 
 I like the raw edge look.  I sewed the heart on the top of my tube. 
Cut a little tie for the back, hot glued it on for hanging. 


I love LOVE. 
Happy Valentine's Day.

A couple more Valentine Ideas:

Tuesday, June 12, 2012

Scissor Keeper Tutorial

Does one need a scissor keeper? 
Yes, you do. 
You just don't know it. 

Scissors need safe keeping
and I'm here to help. 

This keeper will fit an 8" pair of shears
as well as a regular sized rotary cutter. 


Join together scraps that will create 
a 5"  x  11" piece of material. 

Put on top of a piece of scrap batting the same size. 
Run some 'quilting' stitches through the 2 layers. 

Use a coordinating piece of felt for the back. 
Layer the quilted portion on top of the felt. 
Download this pattern

Lay on top of your quilted piece and felt, 
cut around pattern with pinking shears. 
If you don't have pinking shears it's okay. 
Just use regular scissors. 
This is a rustic scissor keeper.

Cut your flap out of felt.
Trim about 1/2 " to 3/4" at the top
of your quilted top. 

This leaves room for you to slip your scissors in. 
Lay flap on top.  
I use about a size 8 perle cotton 
to sew it all together.  

Start in the upper left hand corner, with the knot on the back.
Sew across the top of the felt flap and then continue on around the

scissor shape in one continuous seam. 
End with a knot up where you began. 

Sew a button in the center at the top of the quilted front. 

Feel under the flap where the button is and make a mark with a pen. 

Cut on this pen line for a button hole. 

Easy. 

You're done. 
Enjoy the safe keeping of your precious scissors!


Wednesday, February 8, 2012

Feel the Love

This was to be a
simple little valentine
for a couple of my kids.
A few of us sleep with a warm bag every night
because we are sooo cold.

You heat this in the microwave for 4 minutes,
then stick it in your bed,
then get ready for bed
& when you get in,
it's toasty warm.

Yes, I have heard of electric blankets.
I prefer to pretend I'm Laura Ingalls. :)
So a couple of weeks ago,
I threw their bags down the stairs,
&
hubby wasn't quite ready to catch
& splat
they split open. :(

So I grabbed some favorite scraps &
stitched a little love note to them.
Sewed up the sides.

Now it's ready to be filled
with field corn.
I like this better than rice,
not crazy about moist rice.
Just a preference.
You can get a big bag of field corn
at the farm store. cheap.
Fill 3/4's full.

Tuck the ends in,
stitch &
it's done.

Unfortunately Mr. Nosy noticed.
"Is that for me?"


Yes! It's for you.
Couldn't make him wait.


Their new bags were really cute,
so I wanted a new one
out of
the Apple Girl!


Did I mention the kids
get confused?
They think my bag is their bag?
I don't think we'll have confusion
with these fabrics.

And just so there's no question about it.
This one is...


If you'd like to make a warm bag,
there are simple directions here or it's on the side bar,
under Free Goodies at the bottom.

Friday, March 5, 2010

Mickey-ity-doo-dah Quilt Tutorial

I got a call from a 'think-ahead' brother-in-law last November.
Corrie's hubby was trying to come up
with a surprise gift for his wife-y poo.


We put our 2 great brains together and came up
with the following Christmas miracle.


It's a miracle because surprising Corrie Dawn
with something she has no idea she wants,
IS truly miraculous!

I designed it and he did all the cutting and sewing!
He's a good student.
Join us for your own Christmas miracle,
even if it is March!
Make a
Mickey-ity-doo-dah
Quilt
I just made that name up!
You need:
~ ~14 - strips of 10" from a variety of fabulous prints. Some that 'read' solid and some that are just plain marvelous and busy beautiful!
OR 56 layer cakes - 10" squares.

~~2 strips of 10" black fabric. Doesn't really matter what's on it, not going to see much of it. So go ahead and pull out your halloween fabric!

~~5/8 yard for binding

~~2 1/4 yards of 60" wide minkee for dreamy snuggling

1. From each 10" strip, subcut it into 4 - 10" squares. You will get 4 squares per strip. You need a total of 48 prints for the quilt and 8 prints for the Appliques and 8 black squares. Choose 8 print fabrics that you will use this pattern here to cut out the shape of the ears. Do the same with all of the black squares.
2. Choose 8 print squares that will pleasantly match your ear fabrics. Layer a black ear behind each of the 8 ear print fabrics and place onto each of 8 print squares. I like to offset the black a little for some visual interest. Are you visually interested yet? Yeah, me too. Pin the appliques to each of the 8 squares.

3. We're going for a rough edge applique here. One that will be raggy when it's washed. And um, it's fast and husbands can pull it off fairly easy. Stitch around the two layered fabrics, about a generous 1/4 inch from the edge. We didn't offset the black too much, so we just followed the top fabric edge all the way around. 3. Now, send the kids out of the basement and lay out your 48 squares in a pleasing manner. Set the squares 6 across and 8 down. Scatter the ear blocks throughout.
We let the kids stay in the basement and look what happened!!! 2 materials WAY too close together.
Whoops.
Someone alert the Quilt Police.


4. Sew into rows.
*Sing "It's a Small World". Press.
*Dream of riding Big Thunder Mountain Railroad at dusk. Quilt.
*Imagine eating
10 a fritter in New Orleans Square on your way
to sipping a Dole Whip at the Tiki Room. Bind.
*Fantasize about retiring and working as one of Sleeping Beauty's fairy godmothers. It could happen!


5. Okay. You should be done now.

6. Dream happy thoughts under your adorable quilt.
Dreams come true under this quilt!